
Expert Tile & Grout Cleaning
Trust in Our Expertise to Deliver Exceptional Results!
We have the expertise to clean stone, tile, and grout more thoroughly and safely than anyone. There are several essential steps that must be followed to get the most soil and contamination from porous stone and grout. It takes the proper cleaning solutions, dwell time, cleaning steps and equipment to get the best results.
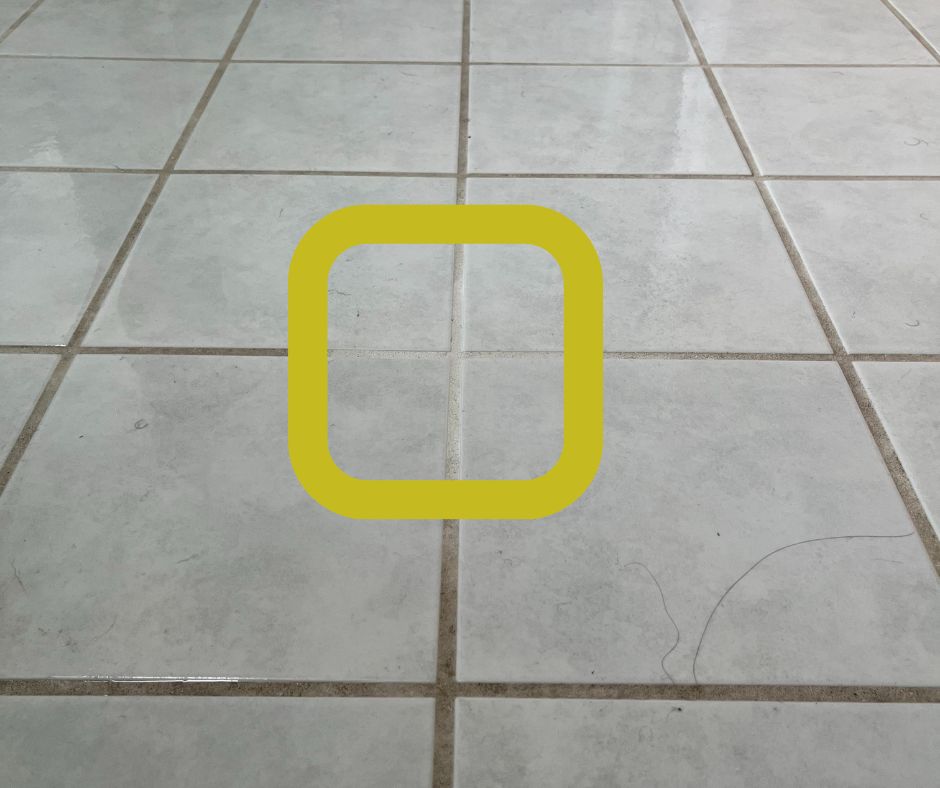
Importance of Testing- Magic Square
We have the most knowledgeable and caring cleaning technicians that outperform the rest. We also do small test areas before proceeding to make sure that you will be delighted with the outcome. The gold square shows our test area, notice the grout color on the inside vs. outside.
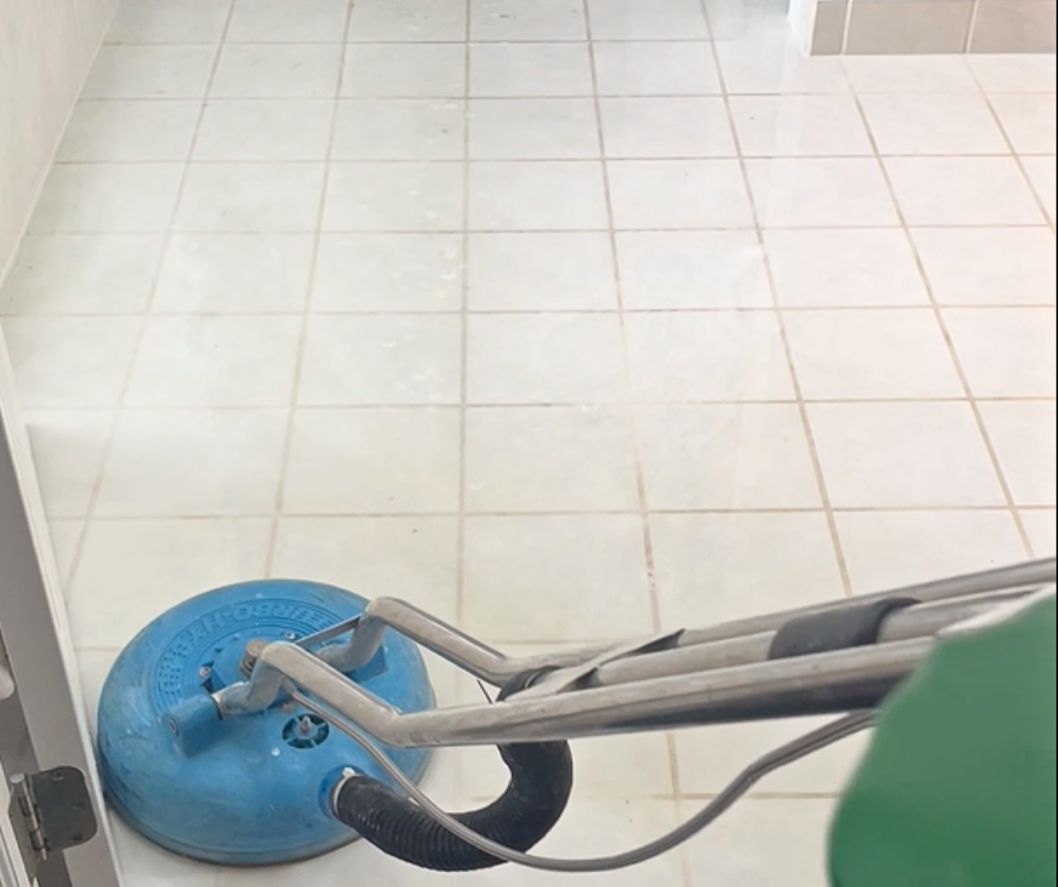
Say Goodbye to Hard Work: Professional Tile and Grout Cleaning.
Cleaning tile floors by hand is hard work. It’s messy, uncomfortable and impossible to get the deep-clean results that come with professional tile and grout cleaning.
This is because regular mopping will never reach the hidden dirt that lies deep within the pores of your grout lines. Grout is a porous material and it collects dirt, grime and spills, often discoloring the surface.
HOW we clean Showers step by step
Purpose: To restoratively clean shower walls, floors, grout, and fixtures to the highest practical level while safely removing soap scum, body oils, mineral deposits, mildew, and other contaminants. Platinum service includes detailed restoration, aggressive hand detailing, and inspection for maintenance issues.
Overview: Unlike floors, showers accumulate soap scum, hard water deposits, shampoo residue, body oils, and mineral buildup. These contaminants require specialty acidic cleaners, extended dwell times, and detailed agitation. The objective is to restore the shower as close to original condition as safely possible.
Procedure
- Inspection
- Identify the tile or stone type.
- Test cleaners in an inconspicuous area.
- Identify:
- Cracked or loose grout.
- Missing grout.
- Loose, cracked, or deteriorated caulk.
- Hollow sounding tile.
- Previous repairs.
- Etching or permanent mineral damage.
- Inform the customer that loose grout or failing caulk may become more noticeable after cleaning.
- Recommend grout repair, caulk replacement, sealing, or color sealing where appropriate.
- Pictures
- Back up and take a good picture of the entire shower
- Close ups of any concerns
Protect Surrounding Areas
- Protect adjacent flooring.
- Protect glass, chrome, brushed nickel, brass, painted surfaces, and natural wood trim when necessary.
- Remove loose personal items if requested.
- Dry Debris Removal
- Remove loose hair.
- Remove loose debris from corners and drain.
- Remove heavy soap residue if necessary.
- Razor Blade
- Test Area
- Demonstrate cleaning results.
- Verify cleaner selection.
- Determine whether High pH cleaner alone will restore the shower or if additional detailing is necessary.
- Heavy Deposit Removal
- Remove heavy soap scum with real or plastic razor blades or approved scraping tools.
- Remove thick calcium buildup prior to overall cleaning. Real or plastic blades
- Detail corners and fixtures.
- Apply Cleaning Solution
- Apply high pH product liberally.
- Completely wet all tile, grout, stone, glass, and fixtures.
- Allow 10–15 minute dwell time.
- Reapply as needed.
- Do not allow product to dry.
- Agitation
- Agitate tile surfaces with appropriate scrub pads
- Drill Driver with scotch brite pad or hand pads
- Aggressively brush grout lines.
- Drill brush or detail brushes for grout lines.
- Detail corners, niches, benches, and around plumbing fixtures.
- Continue until heavy buildup is loosened.
- Rinse & Extract
- Thoroughly rinse all surfaces.
- Pressure rinse where appropriate.
- Hand Spinner and or Cobra
- Extract standing water.
- Flush corners and grout lines.
- Ensure no cleaner residue remains.
- Secondary Treatment (if needed)
- Apply Low pH cleaner to remaining mineral deposits.
- Repeat dwell and agitation.
- Spot detail stubborn areas.
- Carefully remove remaining deposits with approved tools.
- Use soap scum remover after razor blading off the bulk
- Use bleach product if mold is present
- Final Detail Cleaning
- Detail fixtures.
- Detail shower door tracks.
- Clean corners.
- Remove remaining residue from glass.
- Wipe shelves, niches, benches, and ledges.
- Drying
- Puddles, standing water and slow drying is your enemy
- Use Squeegee
- Wipe all surfaces.
- Use towels
- Leave shower dry and streak free.
- Set up fan
- Optional Protection
- Follow sealing procedures
- Final Inspection
- Verify soap scum has been removed.
- Inspect for haze, look from different angles
- Confirm grout appearance.
- Review remaining permanent staining or etching with customer.
- Photograph completed work. Try to duplicate original photo angles
Purpose: To safely and efficiently clean soiled tile & grout
Overview: Porous grout and porous stone absorb soil and stains slowly because they have microscopic pores. It also takes time for our cleaning solutions to penetrate into these microscopic pores to release these same soils and stains. They also develop an oily film on their surface that prevents our cleaning solutions from penetrating. It is believed that stains and soil penetrate about 1 mm per year (the thickness of a credit card) so if it hasn’t been cleaned in 5 years the stains and soil are 5 mm deep (tough to get out when you think about it. Most ceramic tile is non-porous is not a problem to clean, it is the grout and natural stone surfaces that are hard to clean if not maintained.
Soap Scum and Mineral build up become increasingly more difficult to remove over time.
- Inspection
- Identify the tile or stone type.
- Test cleaners in an inconspicuous area.
- Identify:
- Cracked or loose grout.
- Missing grout.
- Loose, cracked, or deteriorated caulk.
- Hollow sounding tile.
- Previous repairs.
- Etching or permanent mineral damage.
- Inform the customer that loose grout or failing caulk may become more noticeable after cleaning.
- Recommend grout repair, caulk replacement, sealing, or color sealing where appropriate.
- Protect Surrounding Areas
- Protect adjacent flooring.
- Protect glass, chrome, brushed nickel, brass, painted surfaces, and natural wood trim when necessary.
- Remove loose personal items if requested.
- 3. Remove Loose Hair and Debris
- Test Cleaning Area
- ApplyHighpH Cleaner
- Thoroughly wet shower.
- Allow 10-minute dwell.
- Keep wet.
- Agitate
- Scrub walls.
- Brush grout where needed.
- Detail obvious heavy buildup
- Rinse & Extract
- Thorough rinse.
- Remove cleaning solution.
- Flush grout lines.
- Secondary Treatment
- Use Low PH product
- Use Soap Scum remover
- Use Bleach product on mold
- Spot Detail
- Remove remaining soap scum from corners and fixtures as practical.
- Light detail around drains and hardware.
- 10. Dry
- Wipe surfaces dry.
- Use squeegee
- Leave shower free of residue.
- 11. Optional Sealant
- 12. Final Inspection
- Inspect for remaining buildup.
- Review any permanent damage.
- Recommend grout repair or caulk replacement when needed.
Purpose: To safely and efficiently maintenance clean lightly soiled tile & grout
Overview: Porous grout and porous stone absorb soil and stains slowly because they have microscopic pores. It also takes time for our cleaning solutions to penetrate into these microscopic pores to release these same soils and stains. They also develop an oily film on their surface that prevents our cleaning solutions from penetrating. It is believed that stains and soil penetrate about 1 mm per year (the thickness of a credit card) so if it hasn’t been cleaned in 5 years the stains and soil are 5 mm deep (tough to get out when you think about it. Most ceramic tile is non-porous is not a problem to clean, it is the grout and natural stone surfaces that are hard to clean if not maintained.
Soap Scum and Mineral build up become increasingly more difficult to remove over time.
- Inspection
- Identify the tile or stone type.
- Test cleaners in an inconspicuous area.
- Identify:
- Cracked or loose grout.
- Missing grout.
- Loose, cracked, or deteriorated caulk.
- Hollow sounding tile.
- Previous repairs.
- Etching or permanent mineral damage.
- Inform the customer that loose grout or failing caulk may become more noticeable after cleaning.
- Recommend grout repair, caulk replacement, sealing, or color sealing where appropriate.
- Protect Adjacent Areas
- Protect adjacent flooring.
- Protect glass, chrome, brushed nickel, brass, painted surfaces, and natural wood trim when necessary.
- Remove Loose Hair and Debris
- Test Area
- ApplyHighpH Cleaner
- Spray evenly.
- Allow appropriate dwell time.
- Keep wet.
- Light Agitation
- Scrub tile.
- Light grout brushing where necessary.
- Rinse
- Thorough rinse with Viper 7
- Remove cleaning solution.
- Dry
- Use squeegee
- Wipe dry with towels.
- Leave surfaces free of streaks.
- Set up a fan
- Optional Sealant
- 10. Final Inspection
- Verify acceptable maintenance clean.
- Should be streak and stain free
- Check under seats, soap dishes and any ledge for mold/scum buildup.
Breathe Easy: Eliminating Allergens from Your Grout.
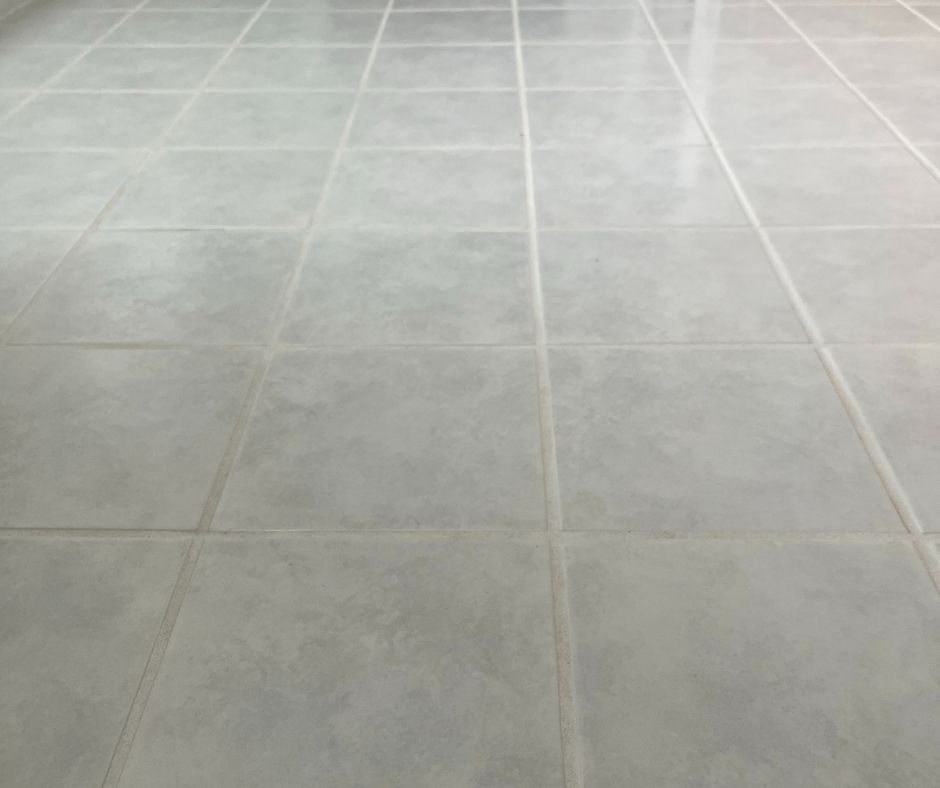
Our professional tile and grout cleaning service uses our proprietary hot water extraction cleaning method to clean out the hidden dirt and restore the luster to your floors. In addition, we’ll remove 96.5% allergens from your grout.
HOW we clean tile & grout step by step
STEP 1. INSPECTION
We inspect to determine the type of surface we are cleaning and to select the appropriate cleaning product. We also look for cracks or chips in the grout to bring to your attention.
STEP 2. MOVE FURNITURE
We move most furniture, although there will be extra charges for moving appliances and heavy furniture
STEP 3. “MAGIC SQUARE”
We will pre-clean one of the worst areas to determine that the results are what you expect. Most of the time the results are dramatic, however, if the grout was not sealed and is deeply stained no amount of cleaning will remove deeply set permanent stains.
Benefit: We would rather test a small area than spend hours only to find that the results were not up to your expectations. In some cases, there could be a minimum charge incurred.
STEP 4. PRE-CLEAN – (WASH STEP)
The appropriate cleaning agent is applied.
Benefit: Only safe nontoxic cleaning solutions are used, they will safely loosen, emulsify and suspend deeply embedded soils.
STEP 5. AGITATION
A special grout brush and machine are used to agitate the solution.
Benefit: This step further loosens ground-in soil.
STEP 6. DWELL TIME
The cleaning solutions are allowed ample time to work their magic.
Benefit: Allowing cleaning agents more time to penetrate deeper into porous grout and stone is the only way to completely loosen deeply embedded soil and stains.
STEP 7. EDGE/CORNER DETAILING
We have special tools designed to get into edges, corners and walls.
Benefit: Nothing is missed, difficult areas that may have been neglected are now cleaned.
STEP 8. CLEAN, RINSE & NEUTRALIZE
The cleaning solutions are allowed ample time to work their magic.
Benefit: Allowing cleaning agents more time to penetrate deeper into porous grout and stone is the only way to completely loosen deeply embedded soil and stains.
STEP 9. REPEAT AS NEEDED WITH SPECIALIZED CLEANING AGENTS
The cleaning solutions are allowed ample time to work their magic.
Benefit: Allowing cleaning agents more time to penetrate deeper into porous grout and stone is the only way to completely loosen deeply embedded soil and stains.
ADDITIONAL OPTIONS
Grout Sealer:
Prevents soil and stains from penetrating into the porous grout where they become permanent. It is highly recommended that all grout be sealed.
Stone Enhancer:
Enhancers give slate and some types of stone a deep, enhanced wet look without leaving a film on the stone.
Color Seal:
Makes sained or discolored grout look like new again.
STEP 1. INSPECTION
We inspect to determine the type of surface we are cleaning and to select the appropriate cleaning product. We also look for cracks or chips in the grout to bring to your attention.
STEP 2. MOVE FURNITURE
We move most furniture, although there will be extra charges for moving appliances and heavy furniture
STEP 3. “MAGIC SQUARE”
We will pre-clean one of the worst areas to determine that the results are what you expect. Most of the time the results are dramatic, however, if the grout was not sealed and is deeply stained no amount of cleaning will remove deeply set permanent stains.
Benefit: We would rather test a small area than spend hours only to find that the results were not up to your expectations. In some cases, there could be a minimum charge incurred.
STEP 4. PRE-CLEAN – (WASH STEP)
The appropriate cleaning agent is applied.
Benefit: Only safe nontoxic cleaning solutions are used, they will safely loosen, emulsify and suspend deeply embedded soils.
STEP 5. AGITATION
A special grout brush and machine are used to agitate the solution.
Benefit: This step further loosens ground-in soil.
STEP 6. DWELL TIME
The cleaning solutions are allowed ample time to work their magic.
Benefit: Allowing cleaning agents more time to penetrate deeper into porous grout and stone is the only way to completely loosen deeply embedded soil and stains.
STEP 7. EDGE/CORNER DETAILING
We have special tools designed to get into edges, corners and walls.
Benefit: Nothing is missed, difficult areas that may have been neglected are now cleaned.
STEP 8. CLEAN, RINSE & NEUTRALIZE
The cleaning solutions are allowed ample time to work their magic.
Benefit: Allowing cleaning agents more time to penetrate deeper into porous grout and stone is the only way to completely loosen deeply embedded soil and stains.
ADDITIONAL OPTIONS
Grout Sealer:
Prevents soil and stains from penetrating into the porous grout where they become permanent. It is highly recommended that all grout be sealed.
Stone Enhancer:
Enhancers give slate and some types of stone a deep, enhanced wet look without leaving a film on the stone.
Color Seal:
Makes sained or discolored grout look like new again.
STEP 1. INSPECTION
We inspect to determine the type of surface we are cleaning and to select the appropriate cleaning product. We also look for cracks or chips in the grout to bring to your attention.
STEP 2. PRE-CLEAN – (WASH STEP) (P,G,S)
The appropriate cleaning agent is applied.
Benefit: Only safe nontoxic cleaning solutions are used, they will safely loosen, emulsify and suspend deeply embedded soils.
STEP 3. EDGE/CORNER DETAILING
We have special tools designed to get into edges, corners and walls.
Benefit: Nothing is missed, difficult areas that may have been neglected are now cleaned.
STEP 4. CLEAN, RINSE & NEUTRALIZE
The cleaning solutions are allowed ample time to work their magic.
Benefit: Allowing cleaning agents more time to penetrate deeper into porous grout and stone is the only way to completely loosen deeply embedded soil and stains.
ADDITIONAL OPTIONS
Grout Sealer:
Prevents soil and stains from penetrating into the porous grout where they become permanent. It is highly recommended that all grout be sealed.
Stone Enhancer:
Enhancers give slate and some types of stone a deep, enhanced wet look without leaving a film on the stone.
Color Seal:
Makes sained or discolored grout look like new again.
request FREE CONSULTATION
BEFORE & AFTER
Critical questions when selecting the right Tile & Grout cleaning company
-Do they Pre-Qualify what the end results will be by performing a sample area?
-What kind of protection do they provide for the other areas over which they may run hoses?
-Do they pre-agitate grout lines prior to cleaning?
-Do they pre-spray or are the detergent and rinse combined in one step?
-Do they have special tools for performing difficult jobs such as edge, wall, and countertop tools?
Chet's does it best
Elevate Your Floors With Expert Tile & Grout Cleaning Service
Witness the brilliance of sparkling surfaces and the revival of hidden beauty, as we elevate your floors to unmatched levels of perfection. Experience the joy of walking on immaculate tiles and grout, knowing that our exceptional cleaning services have not only refreshed your space but also enhanced its hygiene and longevity.
When we clean tile and grout, we use a high-pressure water and vacuum system along with a cleaning solution that doesn’t leave a residue.
Grout is a porous material that absorbs soil and spills, just like carpet. Applying a sealant creates a protective barrier, making it easier to clean spills on your grout before they soak in.
Avoid bleach and other harsh chemical cleaners that might break down sealants around your tile and grout.
-Always rinse after you mop.
-Avoid using bleach and other harsh chemical cleaners that might break down the grout and sealants.
ALL Stone, Tile, and Grout.
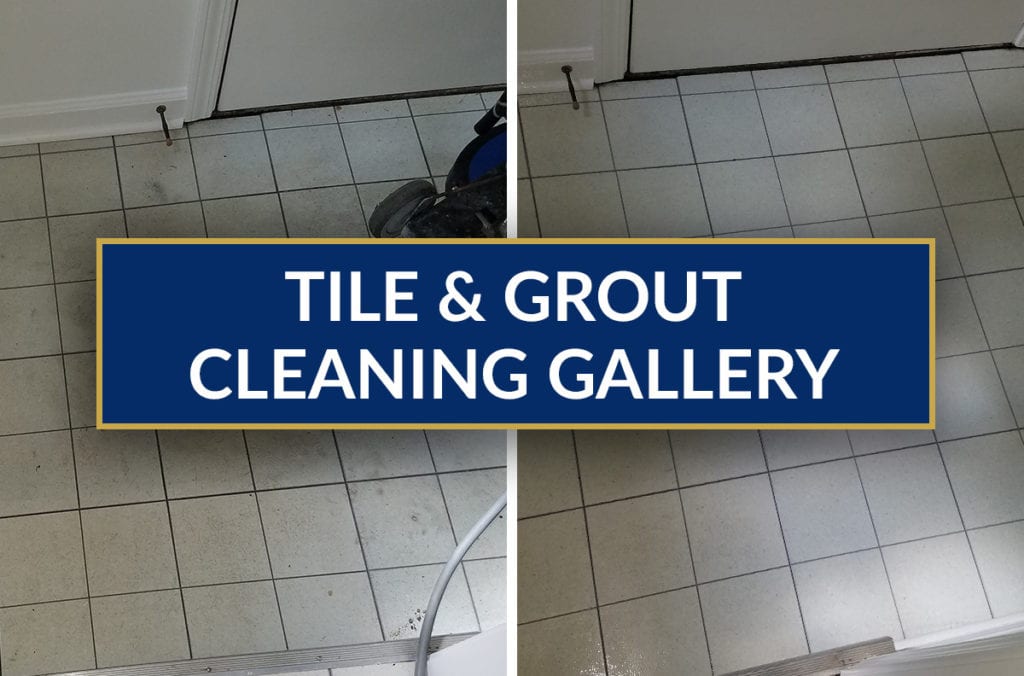
Click Here and Check Out Our Gallery of Tile & Grout Services Before and After Pictures.
FAQs
Most frequent questions and answers
When cleaning grout, avoid using bleach and other harsh chemical cleaners that might break down sealants. The best way to clean grout is using a natural grout cleaner.
We recommend mixing 1/2 cup of baking soda, 1/4 cup of hydrogen peroxide, 1 tsp dish soap. Mix together the baking soda, hydrogen peroxide and dish soap. Spoon mixture onto grout, wait 10 minutes, scrub and rinse.
Just like carpet, dirt builds up over time dulling your tile’s appearance and discoloring your grout. A thorough, professional tile and grout cleaning is the only way to remove the deep-down dirt. Learn more here.
You can find a tile and grout cleaner near you on our website in the upper right-hand corner. Or give Chet’s Cleaning a call at 248-584-1819 and our customer service team will help you.
As with carpet, many factors must be considered when determining the frequency of tile and grout cleaning. Foot traffic, children, pets, and routine floor maintenance will affect how often you need to have your tile and grout cleaned.
We scrub each individual grout line as well as tiles with tile and grout specific cleaners. We clean using high pressure that hooks up to our truck-mounted unit that will extract the dirt and grime embedded in the grout lines.
1751 E Lincoln Ave, Madison Heights, MI 48071
Phone: 248.584.1819
Fax: 248.584.2319
Cleaning Services
Hours
- Monday-Friday: 8am-5pm
- Saturday: Closed
- Sunday: Closed